Getting started
This section describes how to access both the command line and GUI of the testbed system. The testbed is part of a larger machine, NEXTGenIO, with testbed users typically building and emulating their FPGA codes on a specific front-end node, and then running on the FPGAs which are part of back-end nodes. The front-end node contains two 48-core Cascade Lake Xeon Platinum CPUs, 512GB RAM, and files are stored on the Lustre high performance parallel filesystem which is also visible to the back-end nodes.
Command line access
The testbed system is only accessible via the gateways jump host, and in the previous applying for access step you will have signed up for accounts on both gateways and NEXTGenIO. To access the testbed you need to therefore need to ssh through gateway.epcc.ed.ac.uk to the NEXTGenIO system. This system has two login nodes, nextgenio-login1 and nextgenio-login2, you can use either of these. Therefore, the command you need to access the system is:
username@localhost:~$ ssh -J gateway-username@gateway.epcc.ed.ac.uk nextgenio-username@nextgenio-login1
[nextgenio-username@nextgenio-login1 ~]$
ADVICE:
You can have the same username for both the gateway and nextgenio systems, although you don’t have to
You will be prompted for your password when login in, this is the password for your NEXTGenIO account, which you can look up through the SAFE website when you initially accces
It is possible to automate the jump step by setting this up in your ssh .config file as a proxyjump
You may need to use an ssh key to connect, this can be specified using the -i flag to ssh
Desktop access

The lightweight XFCE desktop is installed on the front-end of the testbed system, which is especially useful for programming FPGAs as much of the tooling has a graphical component to it. The front-end is also running X2GO which tends to provide much better performance than vanilla X forwarding. Therefore we strongly suggest accessing the desktop via X2GO, with users just needing to install the client program which is available here.
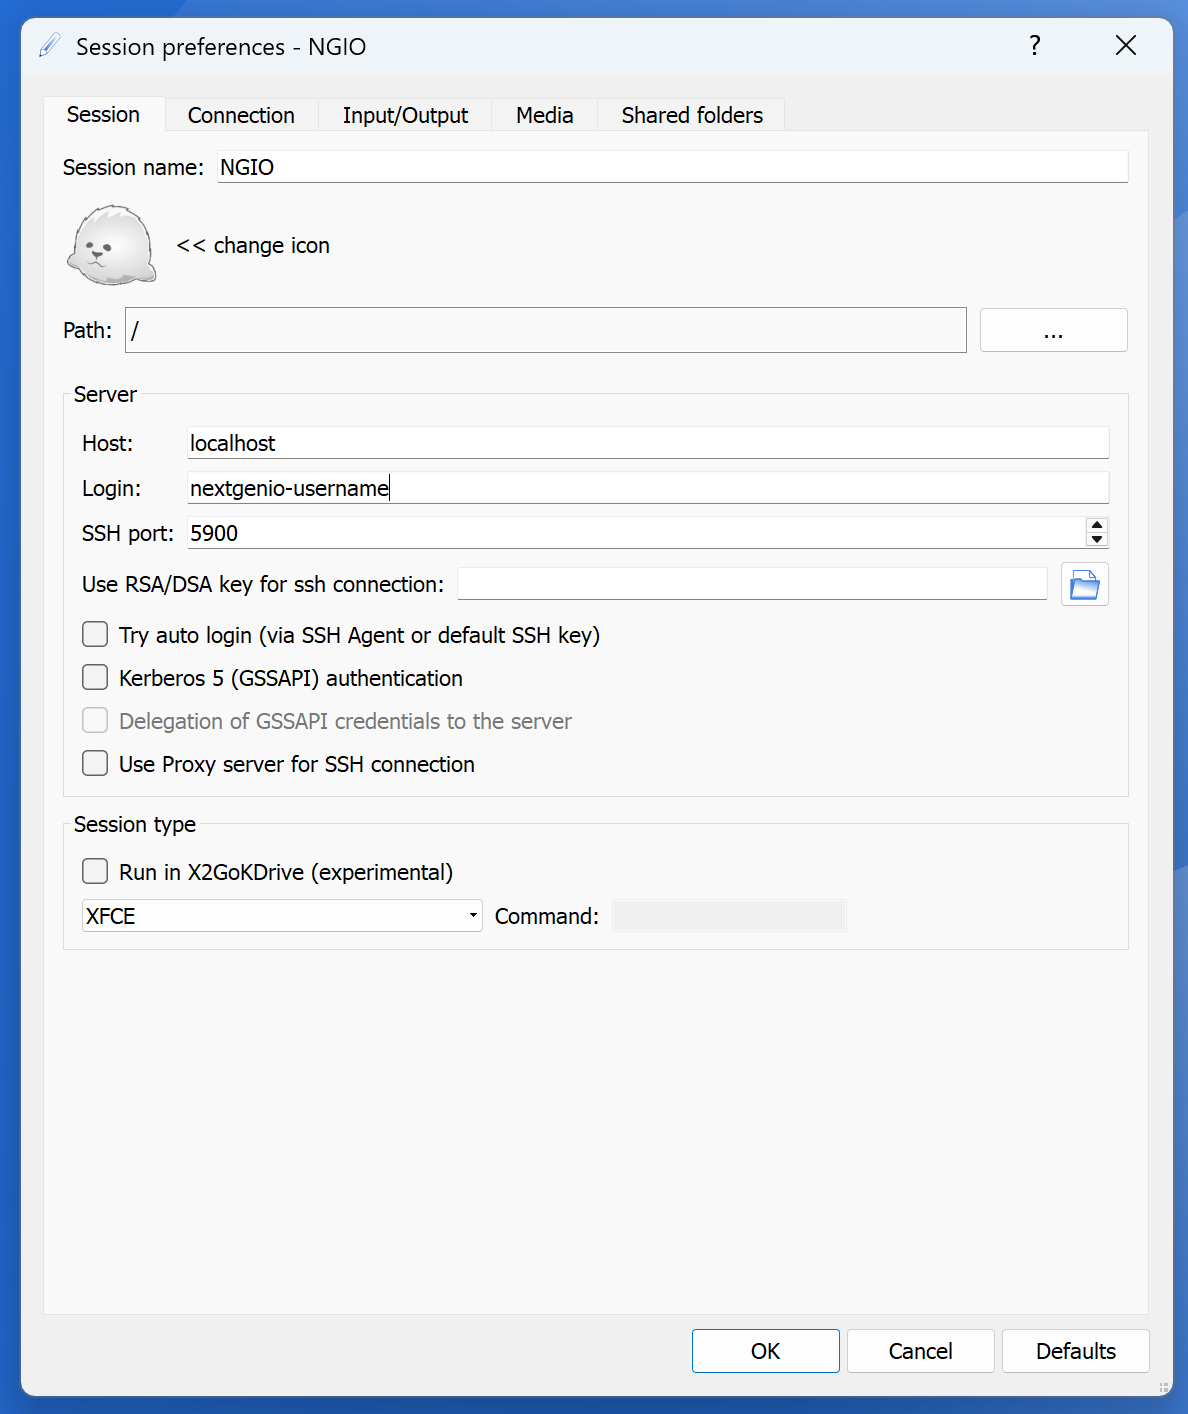
To use this you should setup a port forward connection:
username@localhost:~$ ssh -L 5900:nextgenio-login1:5900 -J gateway-username@gateway.epcc.ed.ac.uk nextgenio-username@nextgenio-login1
[nextgenio-username@nextgenio-login1 ~]$
Then setup an XFCE connection but creating a new profile with settings matching those as illustrated in the picture.
NOTE:
Whilst it is possible to run the individual graphical tools directly via X2GO, we strongly suggest doing this via the XFCE desktop environment as find that this provides a much better user experience.
FPGA specific tooling
FPGA tooling and useful associated applications are available on the front-end via the module environment. There are a default set of modules made available on login (which can be viewed via module available) and a set automatically into the user environment (which can be viewed via module list). More general details about the module environment can be found here.
The FPGA specific modules are not available by default and must be loaded, this can be done via the command below
[username@nextgenio-login2 ~]$ source /home/nx08/shared/fpga/fpga_modules.sh
[username@nextgenio-login2 ~]$ module available
----------------- /home/nx08/shared/fpga/modulefiles -----------------
   bittware/s10mx        common_fpga/1.0    host_support/0.1
   intelFPGA_pro/20.4    ocl-icd/2.2.12     vitis/2020.1
   vitis/2020.2 (D)      vitis/2021.1       vitis_libraries/2021.2
   xrt/2.11.634
ADVICE:
You can add this command into your .bashrc file which will then make these modules available automatically.
There are more details about the specifics of these modules on other pages, however common_fpga/1.0 deserves some discussion. This contains common applications that are generally useful when programming FPGAs. Currently this makes available firefox, GUI, and GUI-GUI.